Get your hands a little dirty while digging into some flour because Easter is right around the corner and these cookies are a delicious and fun way to celebrate. My son was pretty happy that I wanted to make frosted soft sugar cookies because he likes making them, but mostly he likes eating them.
 I love soft sugar cookies with yummy frosting and sprinkles, they transport me back to carefree days and fun times of college. My roommates introduced me to these
 evil cookies when they would go get Cokes from the local gas station. Go figure they sold these amazing cookies at gas stations when I went to college, once I had one I was hooked. Today they sell these cookies in most grocery stores around the country and at every holiday season imaginable.
 While in college I did a fair amount of baking and my roommate had a recipe for these yummy cookies that I loved, but the recipe I chose to slightly adapt is from The Novice Chef. I had pinned her recipe a while back on Pinterest and have them as my cover photo to my cookie board. Her recipe for soft frosted sugar cookies is amazing, you will love them as much as we do. I made just a minor change to the recipe, I also used a very typical buttercream frosting that I use often when decorating cakes.
Easter Sugar Cookies


1 cup unsalted butter softened or at room temperature
2 cups granulated sugar
2 eggs
1 1/2 cups light sour cream
1 teaspoon vanilla
6 cups all purpose flour
1 teaspoon baking soda
1 teaspoon baking powder
1 teaspoon salt
Directions:
Step 1: In a large mixing bowl beat the butter an sugar until creamy. Add the eggs one at a time mixing well after each. Mix in the sour cream and vanilla.
Step 2: Add 5 cups of flour and the baking soda and powder, salt and mix on low speed until all combined. Add the last cup of flour a 1/4 cup at a time until the flour is all mixed in.
Step 3:Take three long pieces of plastic wrap and put on your work surface. Put flour on the plastic wrap and divide dough into 3rds, spread out the dough with floured hands and wrap up. Refrigerate the dough overnight.
Step 4: When ready to bake pre-heat oven to 425 degrees fahrenheit. Get 2-3 cookie pans ready by lining with parchment paper or silpat, if you don’t have either one of those then spray with cooking spray.
Step 5: Roll out dough on a floured work surface to about 1/4 inch and cut with cookie cutters of your choice. I used Easter cookie cutters and a large round biscuit cutter. Bake cookies for 7-8 min until still white or very lightly browned. Because these cookies are cakey you want them to be very moist and if you cook too long they will be dry. Cool on a cooling rack and then frost when completely cool.
Makes: about 4 dozen
Frosting:
1 cup room temperature butter
4 cups of powdered sugar
3-4 tablespoons of milk
1 teaspoon vanilla
Directions:
Step 1: Beat butter until smooth in large mixing bowl.
Step 2: Add the sugar and milk and vanilla then beat until mixed well and no lumps scraping down the sides to get all incorporated.
Step 3: Add food coloring to the frosting if you want or leave white. Frost the cookies and enjoy.


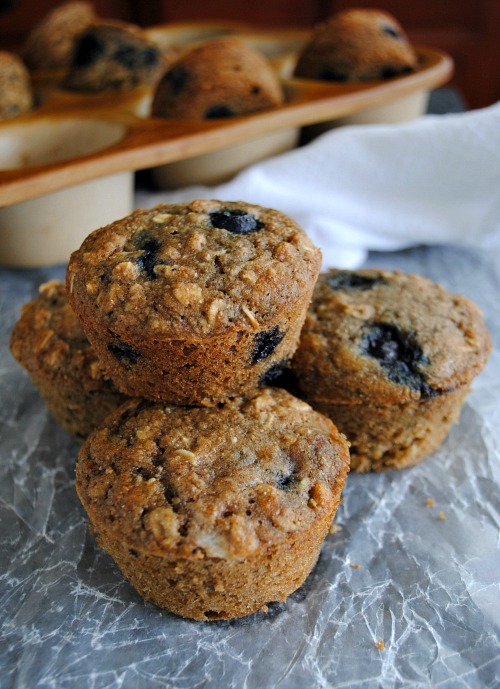
 Some people poo poo oats 🙁 but not me, I love them cold or hot. I’m one of those people that still believes they are healthy for me, especially when they are whole. This breakfast on the go or snack is easy to make ahead of time, taste good and has lots of good for you stuff in it. If you don’t have agave syrup to add for sweetener then just add honey. The recipe makes just two servings. Hope you give this simple little recipe a try.